
_1745823981883.webp)

Step-by-Step Guide: How to Install a Reverse Osmosis Device at Home
Installing a reverse osmosis device in your home will greatly improve the quality of your water and give you a reliable source of clean water. Along with getting ready to try it, this detailed installation guide walks you through the whole process. If you know how to put something in the right way, it will work well and last a long time, whether you're a building manager in charge of many projects or a homeowner who wants clean water. If you carefully follow these steps, your water will stay clean for years to come and look like it was cleaned by a pro.

Introduction: Understanding Reverse Osmosis Devices and Their Growing Importance
A lot of people think that reverse osmosis is one of the best ways to clean water these days. RO systems clean your water by getting rid of up to 99% of heavy metals, germs, viruses, and dissolved solids. They do this by using semi-permeable filters. This advanced filter system works by applying pressure to tiny membrane holes that let water molecules pass through. The bigger dirt particles get stuck, though.
People worry about the safety of water in their homes and businesses, which makes RO technology more important. RO systems today get rid of chlorine, poisons, drugs, and other harmful things that older cleaning methods don't always get rid of. Not having to buy expensive and harmful bottled water all the time is possible with these tools. You can get clean water right away.
Installing a reverse osmosis device system correctly has a direct effect on how fast it works, how much it costs, and how long it lasts. People who are trained to do this job can escape issues like pressure drops, membrane damage, and the chance of contamination. Building managers and expert staff can make smart decisions about their water treatment investments and make sure they meet quality standards when they know how to put something in place.
Preparing for Installation: What You Need to Know Before Getting Started?
The first steps to a good RO system installation are to plan and get ready. The first step in any repair job is to check the quality of the water. Depending on how many contaminants are in the water, different pre-treatment or filter options may be needed. If you test the water source, you can find the best system size and design for your needs.
Assessing Your Water Quality and System Requirements
You should do a full water study before you start the work to find out what kinds of pollution are already in the water and how strong they are. What this study finds out is whether or not extra pre-treatment parts are needed to keep the ro membrane safe and get the best performance. A lot of the time, there is too much chlorine, too much grit, or too many total dissolved solids, which may need extra filter steps.
How big the system needs to be and how much room it needs to store things depend on how much water is used every day. Most of the time, systems for businesses need bigger tanks that can hold more water than systems for homes. If you know when a lot of people are using water, you can make sure there is enough for when demand is high.
Essential Components and Tools for Installation
These days, reverse osmosis device RO systems have many important parts that work together to clean water. Other filters, called post-filters, polish the water one last time to make it taste and smell better. Pre-filters get rid of bigger particles and chlorine that could damage the RO membrane. There are no breaks between rounds of cleaning because the holding tank always has clean water on hand.
An adjustable wrench, pipe cuts, drill bits, and Teflon tape for safety links are some of the tools that you will need for the job. Putting on safety gear like gloves and eye protection is the safest way to handle drugs and parts. When you have everything you need on hand, the fitting goes faster and doesn't take as long.
Steps 1 to 5: Detailed Installation Process for Your Reverse Osmosis Device
Set up in a way that makes sure the system works well and is safe during building. Each step builds on the last, giving you a complete way to treat water that always works. If you pay attention to the little things when you install something, you can avoid maintenance issues later on and make the tool last longer.
Step 1: Shutting Off the Water Supply and Preparing the Plumbing
Before you start the installation, find the main water supply switch and flip it off. That way, the area won't leak while you connect the pipes. To drain the water lines, open the taps at the installation spot. The work area is safe, and the link points stay clean thanks to this plan.
Find the pipe that brings cold water to the RO system. This line is usually under the kitchen sink in a home. Make sure there is enough space to put the system parts and that the area where the connections are made is clean. Read the instructions that came with the clamps and holding tanks and mark where they should go.
Step 2: Installing Pre-Filters and Membrane Housing
The pre-filter housings need to be put in the right order. The carbon filtration stage comes after the dirt filtration step most of the time. There are arrows on the housings' bodies that show where to put each one so that the water runs in the right direction. All clamps should be tightly joined together so that they don't move or shake when they're being used.
When putting the RO membrane housing together, pay close attention to where the pipes enter and leave the housing. The membrane itself needs to be treated with care so that the semi-permeable surface doesn't get broken. Follow the manufacturer's instructions for how to put the membrane in and make sure it fits right inside the case.
Step 3: Connecting the Storage Tank and the Distribution Faucet
It is best to put the holding tank somewhere out of the way that is still easy to get to for maintenance. To link the tank, use the parts that came with it. To stop leaks, cover threaded joints with Teflon tape. The tank valve should stay closed while the system is being filled up for the first time to avoid air jams.
If you drill a hole big enough for the fastening tools, you can put the special reverse osmosis device RO tap anywhere you want. Connect the line from the post-filter to the tap. Make sure the pipe is tight so it doesn't get damaged or kinked. It should be easy to use if there is enough room around the hole.
Step 4: Establishing Proper Drain Connections
Put the drain line in place to safely remove the water that the RO process doesn't need. The toxins in this concentrate stream have been taken out, and it now needs to be thrown away properly through water lines that are already in place. Make sure the drain line is tight so it doesn't come apart and that there is enough flow.
Read the system's instructions and put in any flow restrictors or check valves that are needed for the drain line. These parts keep the system's pressure at the right amount and stop pollution from going backwards. Make sure that all of the drain lines in your area follow the pipe rules and laws.
Step 5: System Testing and Initial Flush Procedures
Slowly start to flow water through the system while you check every link for breaks. Check each joint and fitting carefully and fix anything that needs to be fixed to stop any leaks. Let the holding tank and the rest of the system fill up before you start the cleaning process.
You can get the system ready to use by running the first flush process. This will get rid of any output residues. Most of the time, the first few gallons of clean water are thrown away to make sure the quality and taste are at their best. Before you say that the repair is complete, check the water pressure and flow rates to make sure something is wrong.
Maintenance and Troubleshooting: Extending the Lifespan of Your Reverse Osmosis Device
When you fix things on a regular basis, the water quality stays fixed, the devices last longer, and you have less unexpected downtime. Filtration systems work best when they are serviced regularly, and small problems don't get worse and cost a lot to fix. You can quickly fix problems when they happen if you know about common ones and how to fix them.
Regular Maintenance Schedules and Procedures
Parts that wear out quickly should be replaced as part of good maintenance plans, which take into account how much water is used and the quality of the water. Every 6 to 12 months, depending on the type of water used and where it comes from, pre-filters need to be changed. RO membranes usually last between two and three years when they are used normally. Even so, they might need to be changed more often if the water is rough.
Bacteria and scale can make systems less effective over time. Cleaning helps stop their growth. Periodic sanitisation stops germs from spreading, and descaling ways remove minerals that have built up on barrier surfaces. These maintenance jobs make the system work better and make things last a lot longer.
Common Issues and Diagnostic Procedures
Most of the time, low water pressure means that filters or membranes are blocked, which stops water from going through the reverse osmosis device system. Checking the state of the pre-filter is the first step in systematic analysis. The next step is to look at each step of filtering to find the source of the limit. One way to find trouble spots and figure out how to fix them is to use a pressure gauge.
If you can't taste or smell something, it could be because the carbon filters are worn out or because germs got into the system and need to be cleaned right away. Finding out where the bad tastes are coming from in the water helps doctors figure out how to treat them. Regular monitoring helps find changes in how well something works before they have a big impact on the water quality.
Choosing the Right Reverse Osmosis Device: Considerations for B2B Procurement
It's important to think about your working needs, performance specs, and long-term prices when picking out the right RO tools. The water quality, output, and mechanical features need to be different depending on the use. Knowing these needs helps you buy things that fit your budget and help your business reach its goals.
Residential vs Commercial System Differences
Commercial RO systems generally have more production capacity, stronger parts, and better tracking choices than home units. In order to follow the law, industrial uses often need certain Products and licenses. These systems also have extra parts that keep them going as much as possible while they are being fixed.
Smart energy use is becoming more and more important for big reverse osmosis device projects whose prices have a big impact on their income. Thanks to energy return devices and better control systems, modern business systems use less power while still doing the same amount of work. Over the life of the tools, these features save a lot of money on running costs.
Key Procurement Factors and Certification Standards
The rate of membrane refusal is a key success indicator that has a direct impact on the quality of the water. Good screens can get rid of 95–99% of impurities in a lot of different chemicals. Claims of success are backed up by certification from well-known groups like NSF International, which also makes sure that rules are followed.
The terms of the guarantee and the availability of after-sales help have a big impact on estimates of the total cost of ownership. Maintenance plans, emergency response, and professional help that come with service packages are worth more than the equipment itself. These services make sure that the system works well and that there aren't too many breaks.
Conclusion
Setting up a reverse osmosis system needs to be carefully thought out, properly prepared, and done in an organised way for the best results. You can learn all the technical details and useful tips you need to do successful installations and avoid making common mistakes that slow down your system in this full guide. The water cleaning system you buy will work well and last a long time if you follow standard procedures. This is true whether you are building it for your home or a business. Fixing problems and keeping up with repairs on a regular basis makes things last longer and keeps the water clean enough for even the toughest uses.
FAQ
Q1: How long does a typical RO system installation take?
Installation times depend on how complicated the system is and how the place is set up. Most homes have them between 2 and 4 hours, and most businesses have them between 8 and 16 hours. Technicians with a lot of knowledge can set up standard home wiring quickly and properly, making sure that all of the links meet quality standards. The steps of trying, adjusting, and writing down may take longer for commercial projects.
Q2: Can I install an RO system myself, or should I hire professionals?
People who are good at do-it-yourself can install smaller home systems, but getting a professional will make sure you follow all local rules and manufacturer guarantees. For business installations, you need people who have been trained and know a lot about safety rules, plumbing systems, and connecting power. When you hire a professional to install your system, they will test it thoroughly and give you paperwork that shows it works.
Q3: What maintenance is required after installation?
After installation, the filter needs to be changed regularly, the system needs to be cleaned every so often, and the water quality needs to be checked on a regular basis to make sure it stays the same. RO membranes should be replaced every two to three years, while pre-filters should be changed every six to twelve months. The system works better, and the water quality is better when it is checked by a professional once a year.
Partner with Morui for Superior Water Treatment Solutions
Morui can clean your water with cutting-edge technology that is tailored to your needs and quality standards. We use high-tech reverse osmosis systems, have them professionally installed, and offer ongoing expert support to make sure the equipment works at its best for as long as possible. We are one of the biggest companies that make reverse osmosis devices, so we can make goods that meet the needs of businesses, cities, and industries.
You can talk to our knowledgeable staff at benson@guangdongmorui.com about your specific water cleaning needs and take a look at our many goods. Morui can help you meet your sustainability goals and improve the quality of your water by providing effective and reliable water treatment choices.
References
1. Water Quality Association. "Reverse Osmosis Systems: Design Principles and Installation Best Practices." Journal of Water Treatment Technology, 2023.
2. American National Standards Institute. "NSF/ANSI 58: Reverse Osmosis Drinking Water Treatment Systems - Performance Standards and Installation Guidelines." ANSI Publications, 2022.
3. International Water Association. "Membrane Technology Handbook: Commercial and Industrial RO System Installation Procedures." IWA Publishing, 2023.
4. Environmental Protection Agency. "Point-of-Use Water Treatment Systems: Installation and Maintenance Requirements for Compliance." EPA Technical Bulletin, 2022.
5. Membrane Technology Research Institute. "Optimising Reverse Osmosis Performance Through Proper Installation Techniques." Industrial Water Treatment Quarterly, 2023.
6. Plumbing and Drainage Institute. "Professional Installation Standards for Residential and Commercial Water Treatment Equipment." PDI Guidelines Manual, 2022.
 VIEW MOREcontainerized RO equipment
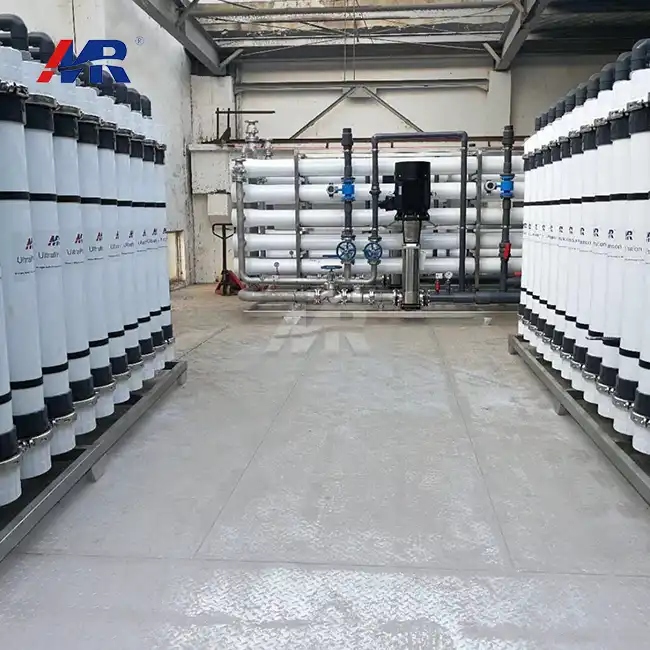 VIEW MORE2000m3/day ultrafiltration equipment
 VIEW MOREDisc Tube Reverse Osmosis
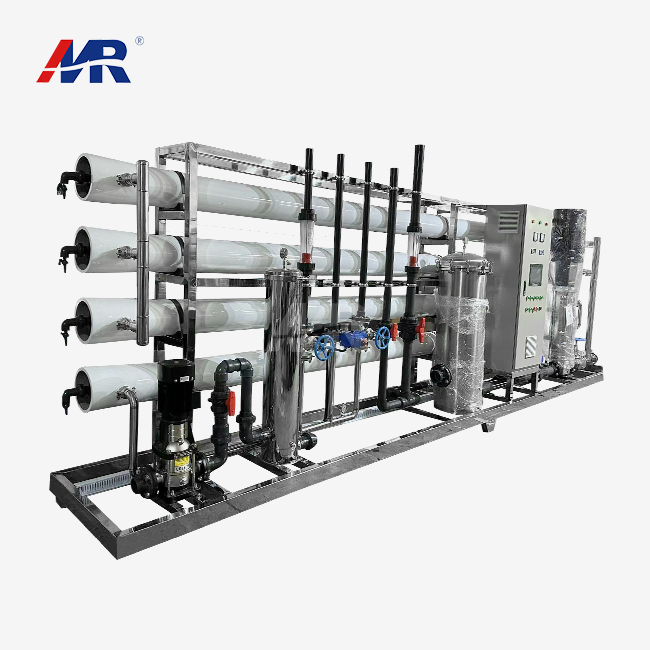 VIEW MOREreverse osmosis plant
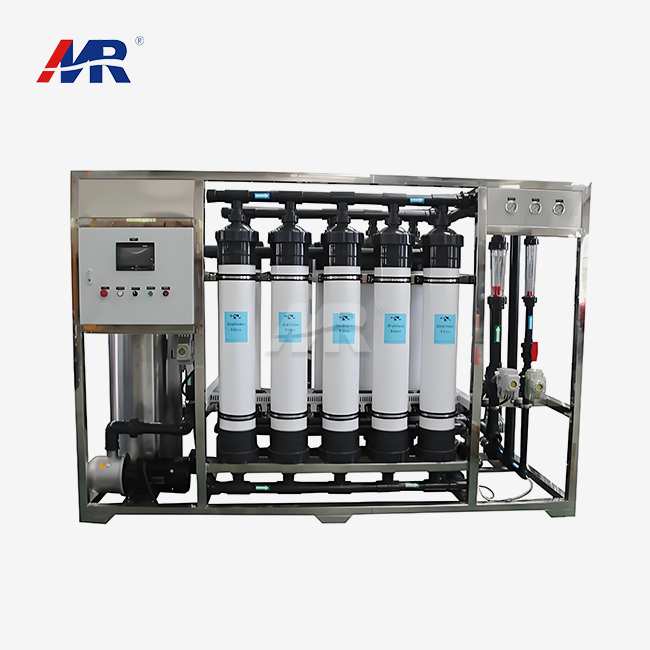 VIEW MOREultrafiltration skid
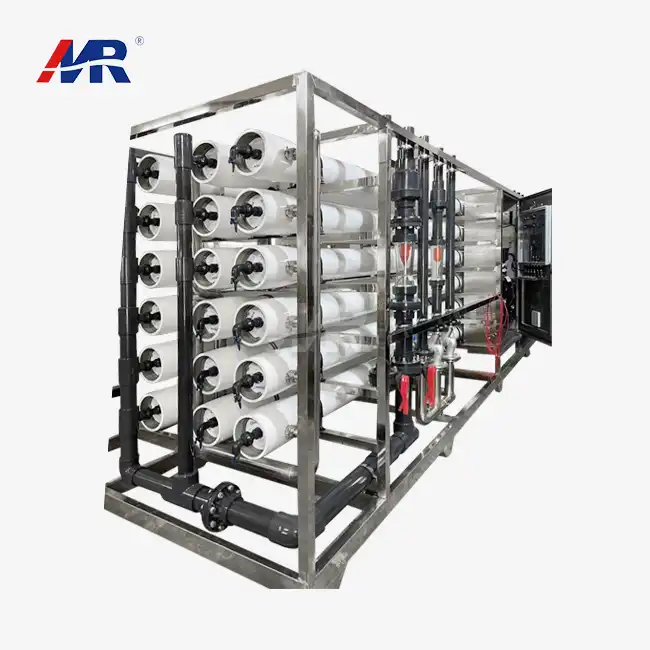 VIEW MORE100m3/hour reverse osmosis equipment
 VIEW MORE70m3/hour ultrafiltration plant
 VIEW MORE25m3/hour reverse osmosis equipment